
Candid photography is one of my favorite forms of photography. The expression ‘Time stops for no man’ comes to mind when I think of photography, and most especially, candid photo work. Life and time never stop, but photography can freeze motion and catch life at its best, its worst and everything in between; preserving something that is gone by the time your finger has clicked the shutter button.
Candid photography has its ups and its downs. You have the chance to work in all sorts of places, and in all sorts of good and not-so-good lighting scenarios. You are not nailed down to one spot, and yet you must remain completely unnoticed. As a candid photographer your unrelenting goal is to remain completely unseen to your subjects. They must hardly notice that you are even there, much less that you have a camera in your itching fingers. Due to the pros and cons in this arena, I thought I would throw out a few things that I have learned as a candid photographer, and have gleaned from watching other candid photographers.
Item #1: To Flash or not to Flash?
If you can get away without a flash, do so. Again if your policy is to remain as inconspicuous as possible, flash will work against your goal. Outdoor events are especially fantastic for getting away without a flash. Indoors with incandescent lighting can be more difficult not only because of brightness, but also the yellow tungsten hues can make everything off colored. To use flash or not to use flash…now that is the question. My opinion is to try and use your flash the least you can so as to remain in the ‘background’ of your event. As the photographer it is really up to you whether you need your flash or not, experiment with different lighting environments and learn what you can and cannot get away with.
Item #2: Where in the world are you? Considering the type of event before your shoot.
If you are attending a formal type event and are asked to get candid photos of the event, there are a few things that you will definitely want to avoid. Alright you dedicated photographers! We all know that when we want a particular shot we will go to any length to get it. However, when in certain environments, do not do certain things. #1: No sitting of lying on the floor. This is a distraction as well as quite odd at a formal or professional event. Try and remain at a humane level! There is nothing worse than a candid photographer who has become the focal point of an event. It’s the equivalent of a speaker who has forgotten to turn off his microphone after leaving the stage! At an informal event where lots of activity is occurring, by all means, roll on the floor as much as you like! Just always keep in mind that invisibility is your goal.
Item #3: Closing In or Heading for the Outfield.
Some of the greatest expressions are lost when we do not close in on our subjects. Children especially are perfect for close-ups. The laugh in a person’s eyes is not caught at 10’ away. You need to get right in their face (I speak figuratively of course. Use your zoom lens!). Also, there are other times when perspective is needed. Sometimes size must be taken into perspective to make a photo more dramatic and realistic. This is especially true with photos that contain both children and adults. The biggest thing to keep in mind when framing your subject is that you are not taking a portrait. The angle, depth of field, and cropping can be quite different in candid work.
As time passes I will jot down some other candid photography tips and pass them onto our blog readers. Be sure to make a comment or ask a question. Below are some candids that were caught using the tips that I have suggested above:
 No Flash...nobody sees, nobody knows.
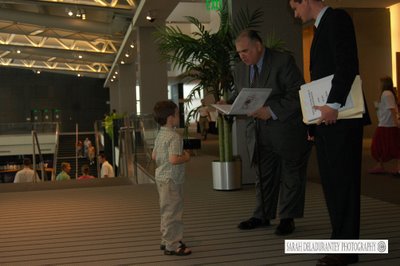
Perspective is key in this photo. If I had cropped to closely, it would lose the proportion difference in the subjects. The smaller you can make children look, the better. Pictured above is Howard Phillips autographing something for my little brother, Phillip.
 Again, no flash = Natural pose.
 This photo required flash, and patience. Waiting for the right moment can test your patience, but when the moment it caught the satisfaction is payment enough!
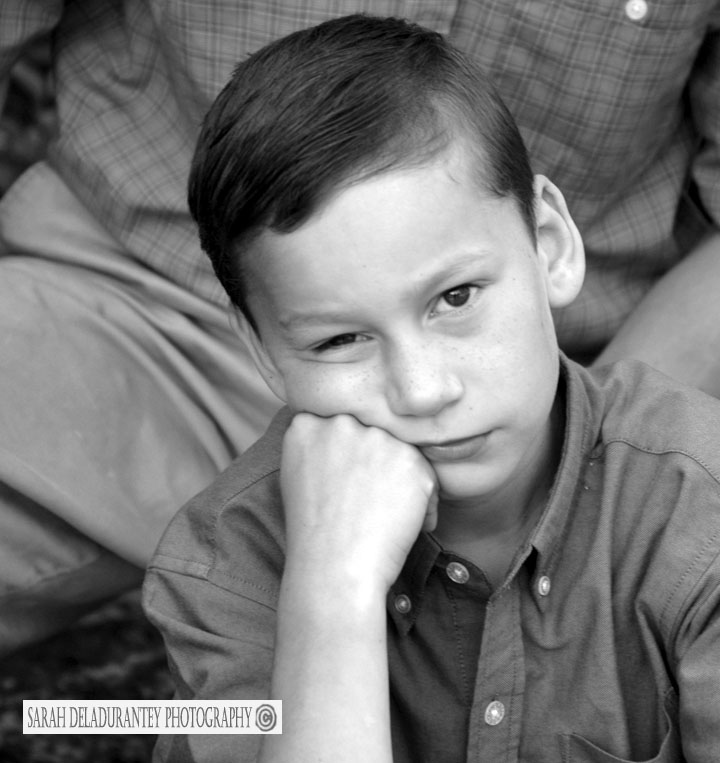 Moody Photos can reveal a person's personality.
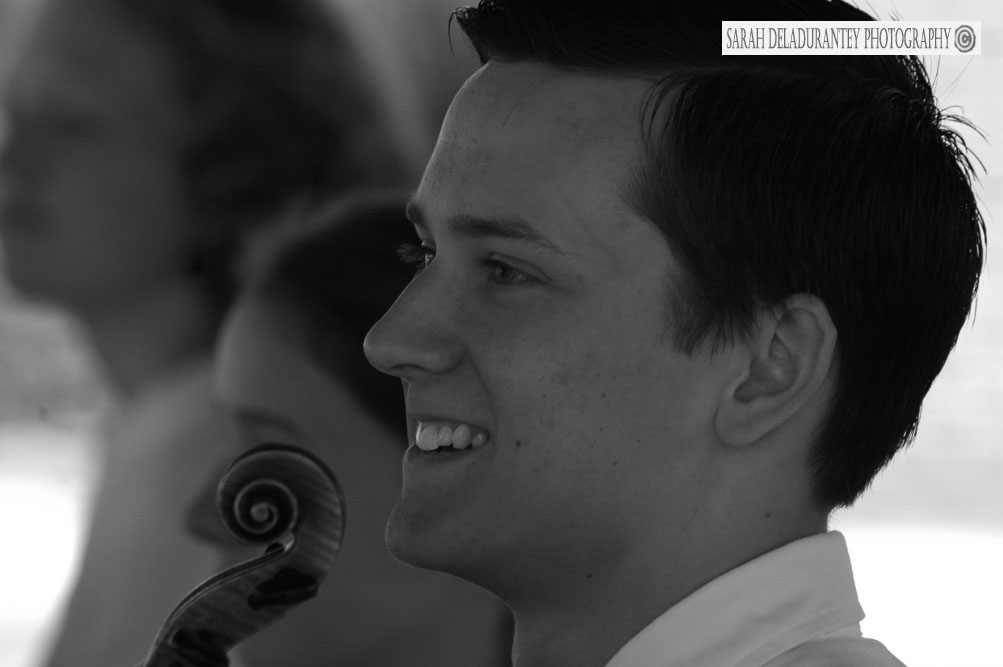 Use your zoom!
beautiful pictures! Question... all your pictures without flash are so sharp. Do you use a tripod? If not, how do you do this? I always have trouble getting clear pictures if I am holding the camera.
ReplyDeleteTiph,
ReplyDeleteFirst of all, thank you for the compliments. Like many, I am still learning as I go!
You question is a great question! Let me try and answer that as best I can.
I never use a tripod for candid work. At least I can't remember a time where I have. I find a tripod to be inhibiting, because you don't have time set it up. You have mere moments to catch candid photos- tripods take time. I know that some folks like using a monopod, although I personally have never used one.
Usually in my candid work I need photos of individuals, therefore I feel rather safe using some of my lowest f-stops (i.e. f4.5 for the most part). Yes, not as much is in focus, however, many times whoever or whatever is in the background does not make a very good backdrop anyway! So there are pros and cons to using lower f-stops.
Secondly, after many attempts without flash, I realized that I needed to know exactly how slow of a shutter speed I could get away with, without camera-shake. Everyone is different, but in candid shooting, I can get away with as slow as 1/80. I would try and see how slow you can go by testing each level of shutter speed / f-stop.
Another thing I suppose I always do on automatic is find a central point at an event with something I can lean against such as a wall or column. This also helps to steady me.
A third idea that I believe helps is making sure that my camera is on spot-metering. I feel that for the most part in my candid work this is more helpful than center-weighted.
Hope that helps!
Sarah
Dear Sarah,
ReplyDeleteI love that I am able to ask questions!!!
Could you explain a little more of spot-metering and center-weighted and what the differences are? Also, how do I do it?
I've been doing metering, but I don't know which method I'm using and the differences of both.
Darleen (your friend from IPS '02)
Darleen,
ReplyDeleteI am so glad that you found our blog. As you can see, this is an endeavor in the fledgling stages, and I pray that it will be successful!
I will try and answer your question as best I can. Many times I understand a concept and its application, yet I don’t feel I do a very good job at communicating what is in my head!
Metering:
Your camera has an internal system that gauges how much light you have within your frame. Most camera systems have Center-Weighted and Spot metering.
If you are not sure which you are using, look in your owner’s manual and see. Depending on your camera, you may only have Center-Weighted. Usually Spot is specified by an icon that has a square (indicating your camera frame) and then a dot in the center. Center-Weighted is usually specified by a square which contains a dot and then a ring around that dot. There are ways to get a spot type metering with your Center-Weighted system. I can go into that if you need me to.
When the camera meter is in Center-Weighted, it ‘sees’ the amount of light within the central area of your camera. From there it then averages (contrast of light range) the amount of light and helps you come up with an f-stop and shutter speed equation. The under or over exposure would be indicated by the measuring system that shows up in your viewfinder. This would show how many stops you need to come up or down. You would than adjust till you are on center with the recommended exposure. When you work in Auto on your camera (if it has that option) the equation would be made, and f-stops and shutter set automatically.
In spot metering your camera would gauge the amount of light from just the very center of your photo. (Look for the icon that represents Spot-Metering. This should help you understand what percentage of the frame spot metering uses.) It again would help you find the aperture and shutter speed settings (and Exposure Compensation if need be). One benefit that you have with spot is the ability to take a metering directly from the area that you want to be your medium light value. You could then use the AE lock and recompose.
The reason I use spot metering in many candid photos is because I find (especially in outdoor scenarios) that my subject is backlit. If I took say a Center-Weighted metering of the situation, my camera would likely give me a reading that would underexpose the subject. Conversely, when I use spot, if I can take a quick reading off of the subject then I am much more likely to have my subject be properly exposed. (A couple side notes on backlit subjects. There is always the option to use fill-flash as well, or take the shot from a different angle. However I find that when I am shooting candids there is not always the time to recompose, or get a proper amount of fill-flash in time to catch what may be happening at the moment. I suppose that with more practice I might be better and faster! Still learning you know!)
Hope that was helpful, Darleen! I am still learning much through experience and study! Have you taken any of the IPS Continuing Education Courses? If so, what did you think of them?
We are always looking for folks to write things for our blog. Please feel free to email me any articles or tips that you have. Something very simple or more complex...we could use writers!You can send them to fringefocus@yahoo.com
So good to hear from you!
-Sarah
Contributing Editor
Knowing that I have the same camera as you do Sarah, I was wondering which mode you used the most when shooting candids?! When other family members use my camera, they pretty much just use 'auto' as they are unsure of the different settings. But do you do all manual? Or shutter speed priority? I'm continually bouncing around between the different ones...
ReplyDeleteThank you in advance! And great candid shots by the way. I so enjoy seeing your work!
Bethany,
ReplyDeleteIt is so good to hear from you! I love my D70...how about you?
I usually shoot in Manual. Every once in a while I will switch to Aperture-Priority. I think that is only because I used that as the transition from Auto to Manual. However, as crazy as it sounds, I am much more comfortable with Manual mode and just with the way my camera meters. The more you shoot the more you are going to be comfortable with the way your camera meters. You will know when to believe it and when to adjust. Many times my camera will meter for an over-exposure, so I just know that leaving it a stop below the setting suggested by the meter I will likely still have a proper exposure.
Every camera is different! Like people...like musical instruments:)
I just shot a candid wedding job on Saturday. I shot Manual the entire time, and used center-weighted meter. The lighting scenario outside was fairly consistent because of the cloudy sky. Thus, the center-weighted worked really well. Spot-metering would likely have really thrown my metering system off with the bride's gown (bright white=bright light), etc. So, I guess you just have to keep all those things in mind when you are shooting!
Sarah
Thanks, Sarah!
ReplyDeleteI am loving my D70, though I still feel that I'm not using it to it's fullest capacity.
How fun about the wedding! The wedding that I am being the main photographer for is in three days -- September 9th. Pray for me! I'm a little nervous, though the Lord has answered so many prayers that I know I am supposed to do it. I just need to learn to trust and rest in Him a little more!
Blessings to you!
Bethany